 JSKAPPS
How to resize a photo to 20 KB for an exam form without wrecking it
Somnath Roy · September 5, 2026
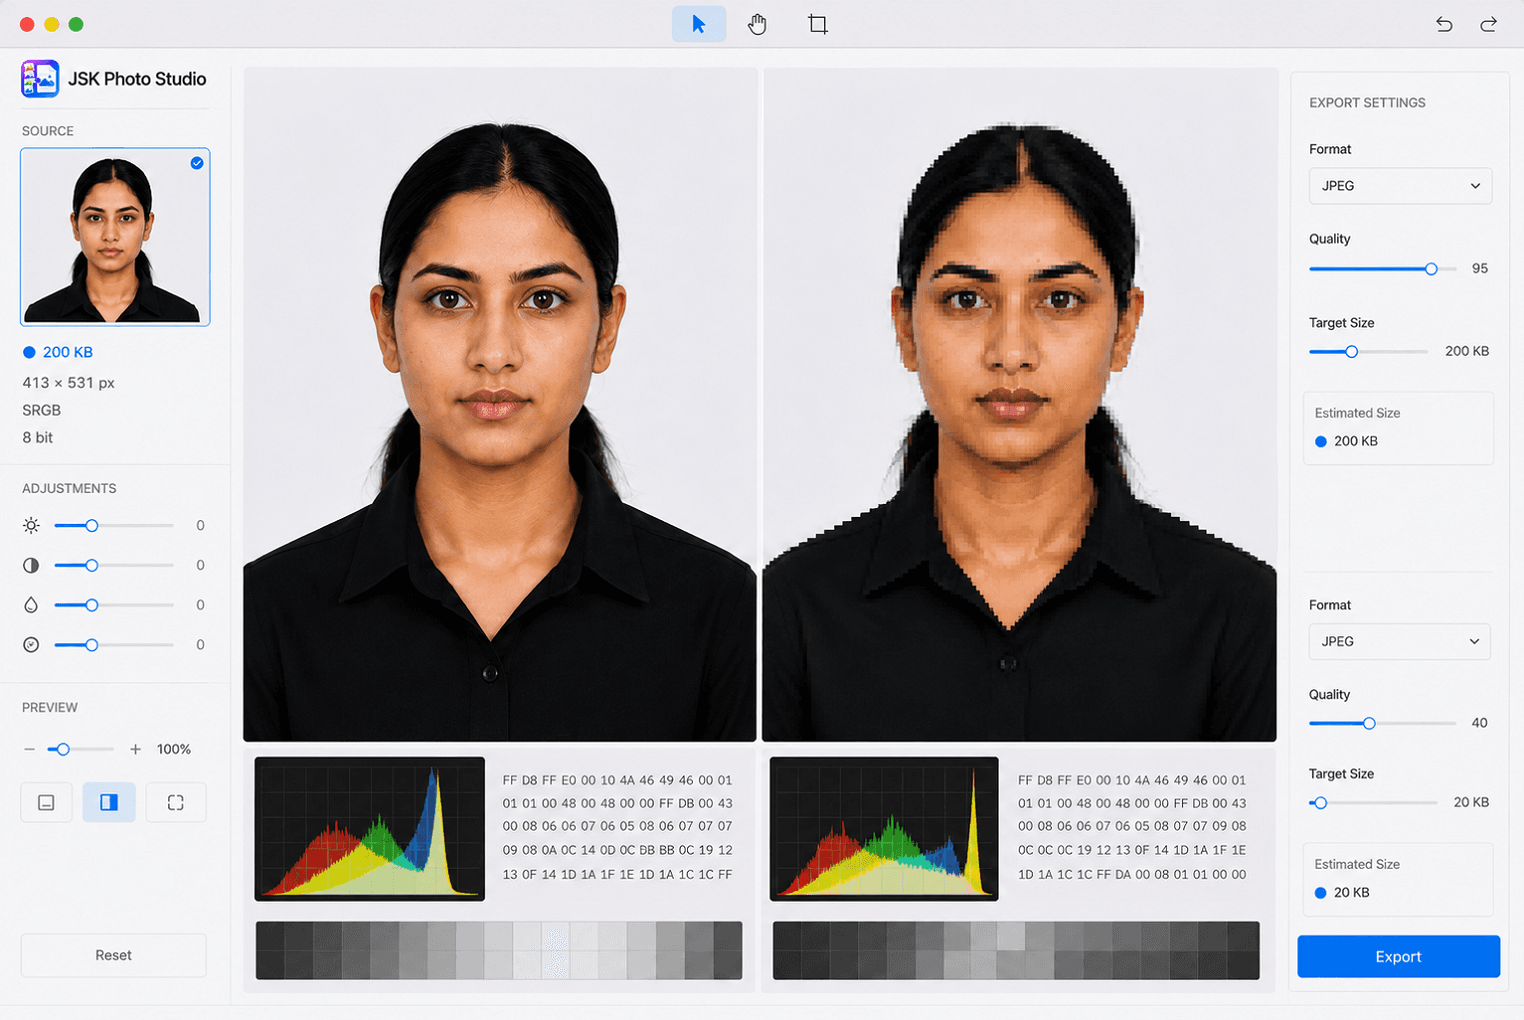
The form says: photograph, JPEG, between 20 KB and 50 KB.
You export from your phone and get 2.4 MB. You find a compressor, drag the slider until the number goes under 50, and upload. It is accepted. Three weeks later you are looking at your own admit card and your face is a smear of grey rectangles around the eyes.
Or the opposite: you compress hard, hit 18 KB, and the portal rejects it for being below the minimum — because a suspiciously small file is how portals detect a photo that has been degraded past usefulness.
Both failures come from treating file size as something you push around until a number is satisfied, rather than something you can aim at.
Why exam portals set a band, not a ceiling
A maximum protects the portal's storage and upload bandwidth. That part is obvious.
The minimum is the interesting one. A 6 KB JPEG of a face contains so little information that it cannot be checked against anything — not by a human at a verification desk, and not by whatever matching runs at the other end. The lower bound exists to stop you solving the upper bound too enthusiastically.
So "under 50 KB" usually means "between 20 and 50 KB", and a tool that only shows you a quality slider gives you no way to know where you have landed until you have already saved the file and looked at it in your file manager.
What actually controls JPEG file size
Three things, in descending order of how much they matter:
Pixel dimensions. This dominates everything else. A 413 × 531 photo has 219,000 pixels. The same photo at 1000 × 1286 has 1.29 million — nearly six times as many. If you are 4× over the limit, the answer is almost always that you are exporting at the wrong dimensions, not that you need more compression.
Quality setting. The JPEG quality factor, usually 0–100. The relationship is not linear: dropping from 95 to 85 costs you very little visible quality and often half the file size. Dropping from 60 to 50 costs you a great deal and saves comparatively little.
Image content. A face against a plain white wall compresses far better than the same face against a bookshelf. This is why the standard advice to use a plain background is not only about the specification — it also makes the file smaller at the same quality.
The practical consequence: get the dimensions right first, then adjust quality. People do it the other way round, which is why their photos end up muddy.
The wrong way, and why it feels right
The usual loop is:
- Export the photo.
- Check the size in the file manager.
- Too big — go back, drag the slider down, export again.
- Repeat four or five times.
- Give up somewhere near the limit and upload.
Every iteration is a guess, and the feedback arrives after you have committed. Worse, most compressors re-encode an already-compressed JPEG, so each pass adds artefacts on top of the previous pass's artefacts. By the fifth attempt you are compressing compression damage.
Doing it on purpose
What you want is the size before you save, updating as you adjust, with the target visible alongside it.
JSK Photo Studio shows the real encoded size in the export bar — the actual bytes, not an estimate — and updates it as you move the quality slider. Open Size target, enter the portal's minimum and maximum in kilobytes, and the readout turns green when you are inside the band.
That single change removes the guessing loop. You are no longer exporting and checking; you are watching the number and stopping when it is right.
For SSC, UPSC and Passport Seva, the band is pre-filled from the authority's published requirement. Profiles taken from a page we have actually read are marked as verified; the others are labelled unverified, because a wrong kilobyte limit is precisely the difference between an accepted and a rejected application, and guessing at one would be worse than not offering it.
The readout and the manual slider are free. A paid plan adds an automated search that finds a qualifying quality for you, but seeing the number is not the part worth charging for — that is the part that makes the job possible at all.
A worked example
Take a typical requirement: 35 × 45 mm photo, JPEG, 20–50 KB.
Set the dimensions first. At 300 DPI, 35 × 45 mm is exactly 413 × 531 pixels. Choose the document size and the export is that size — not "about that", exactly that. This alone usually brings a 2 MB phone photo under 200 KB.
Then work the quality. Start at the default and watch the readout:
| Quality | Typical size | What you see |
|---|---|---|
| 95 | ~120 KB | Indistinguishable from the original |
| 85 | ~60 KB | Still clean; no visible artefacts on a face |
| 75 | ~40 KB | Inside the band; slight softening in fine hair detail |
| 60 | ~25 KB | Visible blocking around the eyes and hairline |
| 40 | ~15 KB | Below the minimum, and obviously degraded |
(Sizes vary with the photograph — a plain background compresses better than a busy one. The point is the shape of the curve, not the exact figures.)
Around 75–80 you are inside a 20–50 KB band with a photo that still looks like you. That is the answer, and you found it by looking rather than by iterating.
Check the background too. If the requirement says white and you have used a light grey wall, the extension will tell you — it compares the colour you have chosen against the document's stated rule and flags a mismatch. A plain background also compresses better, so this helps twice.
If you cannot get under the limit
When the band is genuinely tight — some forms want under 20 KB — you have three honest options, in order of preference:
- Simplify the background. Re-shoot against a plain wall. This is the only option that reduces file size without reducing quality, because you are removing detail that carries no information about your face.
- Reduce the dimensions, if the specification allows a smaller pixel size. Check the requirement first — many state an exact pixel target, in which case this option is closed.
- Accept more compression, last. If you must, get there by lowering quality once from a correctly sized original rather than by re-compressing an already-compressed file several times over.
What you should not do is run the file through three different online compressors in sequence. Each one decodes and re-encodes, and the damage accumulates.
One thing that catches people out later
If the same photo also has to be printed — for a physical application form, or an ID card — file size is only half the problem. A JPEG saved by most web tools carries no print resolution, so a printer assumes 96 DPI and produces something around three times too large.
That is a separate failure with a separate fix, covered in how many passport photos fit on an A4 sheet. Worth reading before you go to a print shop rather than after.
And if you are starting from scratch, how to make a passport-size photo without uploading it anywhere covers the whole sequence from photograph to download.
Summary
- The band has a minimum as well as a maximum, and both are enforced.
- Dimensions dominate file size. Fix them before touching quality.
- Quality 75–85 is where most document photos land inside a 20–50 KB band while still looking like a photograph.
- Watch the real size while you adjust, rather than exporting and checking.
- Never re-compress an already-compressed file repeatedly.
Next steps: Install JSK Photo Studio · Read the documentation
About this tool
JSK Photo Studio