 JSKAPPS
How to make a passport-size photo for free — without uploading it anywhere
Somnath Roy · August 27, 2026
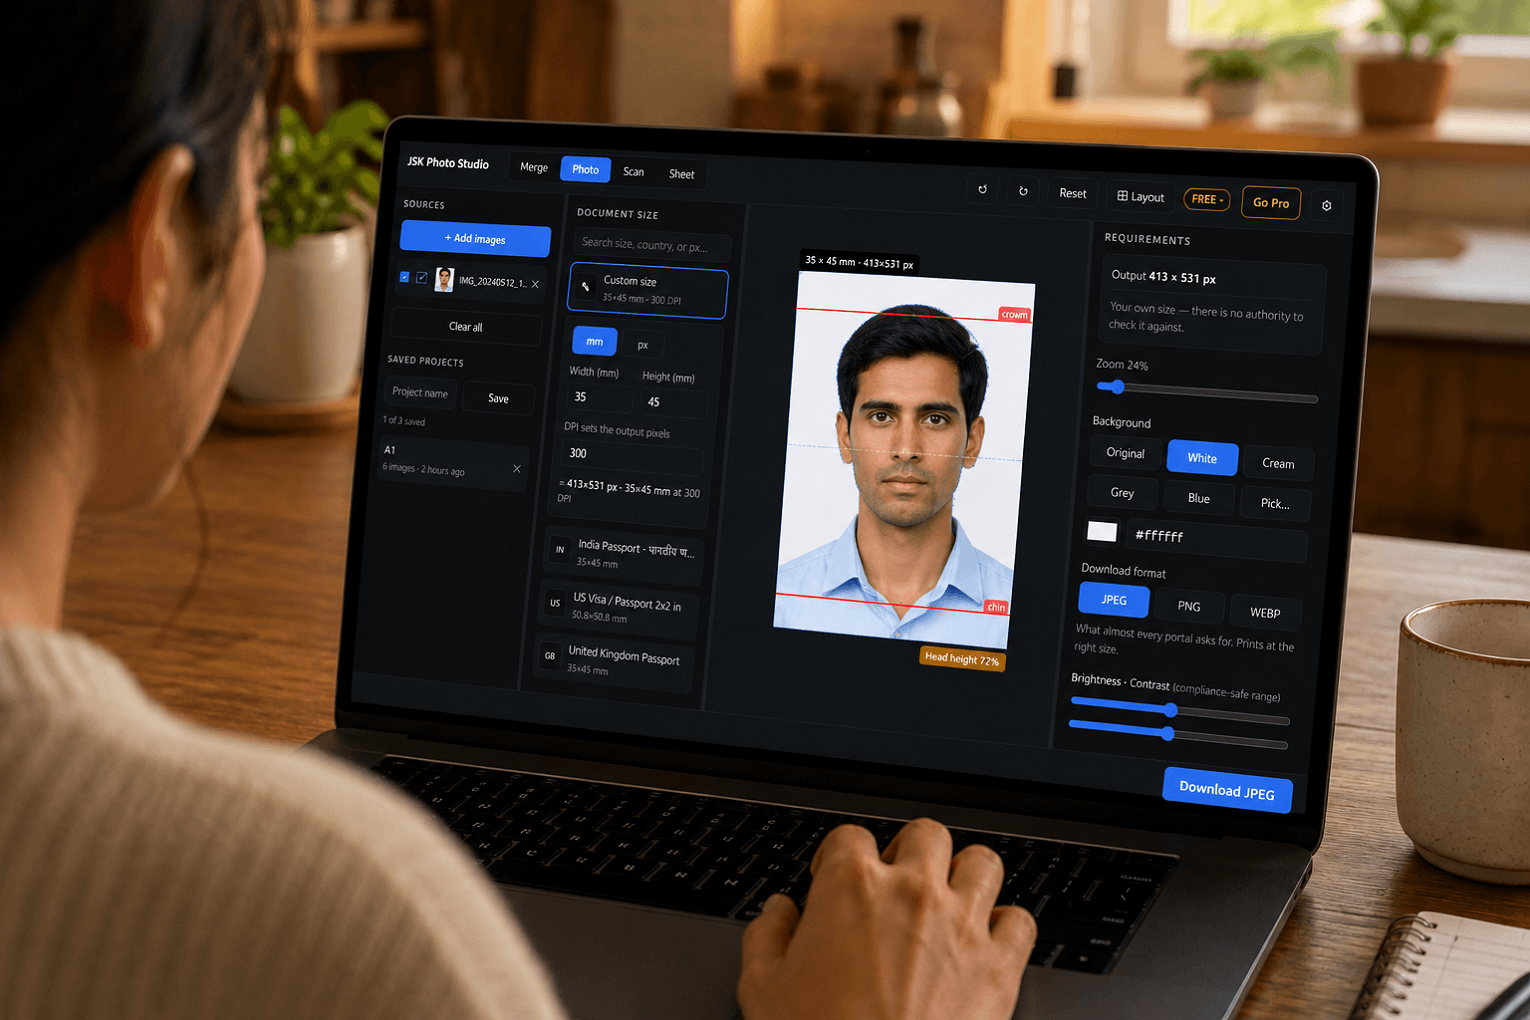
You need a passport photo by this evening. The application form wants 35 × 45 mm, under 250 KB, plain background. The studio in the market closes at seven and charges more than the form costs.
So you search, and you find a dozen sites that will do it for free. Every one of them asks you to upload the photo first.
That is the part worth pausing on. A passport photo is a picture of your face, attached in your mind to an identity document. Uploading it to a site you found ninety seconds ago, whose privacy policy you did not read, whose servers you cannot see, is a larger decision than the interface makes it look. Most of those sites are advertising-funded, which means the network is not incidental to them — it is the business model.
There is a way to do this that never involves a server at all.
The short version
Modern browsers can do everything a passport photo needs — decode, crop, resize, re-encode — locally. Nothing has to be uploaded. A browser extension can therefore do the whole job on your machine, and you can verify that it does, because an extension has to declare what it is allowed to touch.
JSK Photo Studio works this way. It requests one permission — local storage — and no access to any website at all. The workspace shows a live count of network requests, which sits at zero unless you deliberately connect an account.
The rest of this post is the actual procedure, and the two things that most commonly go wrong.
Step 1 — Start from a decent photograph
No tool fixes a bad source. Before anything else:
- Face the camera squarely, with your head straight rather than tilted.
- Use flat, even light. Window light on an overcast day is close to ideal. Direct sun makes hard shadows on one side of your face, and most specifications reject shadows on the face or behind it.
- Stand about half a metre from a plain wall, not against it. Distance is what stops your own shadow landing on the wall behind you.
- Neutral expression, mouth closed, eyes open and visible. Glasses are refused outright by many authorities now; if in doubt, take them off.
A phone camera is entirely sufficient. Resolution is rarely the constraint — a 35 × 45 mm photo at 300 DPI is only 413 × 531 pixels, which any phone from the last decade exceeds several times over.
Step 2 — Pick the actual document size
This is where most people go wrong, because "passport size" is not one size. India's passport photo is 35 × 45 mm. A US passport photo is 2 × 2 inches — square, and noticeably larger. Schengen visa photos, OCI documents and PAN cards all differ again.
Open the Photo tab and search the size list by name, by country, or by pixel dimensions — typing 413x531 finds the sizes that match. Each entry links to the issuing authority's own published specification and shows the date it was last checked, so you can confirm the requirement at its source rather than taking anyone's word for it.
If your document is not listed, a free JSKAPPS account lets you type the size yourself in millimetres or pixels, with your own DPI.
Step 3 — Crop to the guides, then check the head height
Drag the photo to position it and use the zoom slider to size it in the frame. Then do the step almost every free tool skips: drag the crown line to the top of your head and the chin line to the bottom of your chin.
This matters because head height is a real requirement, not a nicety. India's passport specification, like most, states how much of the frame your head must occupy. A photo that is correctly sized in millimetres but has your head at 55% of the frame when the specification says 70–80% is a rejected photo, and the rejection usually arrives weeks later.
Because you place the lines yourself, the measurement comes from a human rather than from face detection that might be confidently wrong. The compliance card then reports the actual percentage against the published band, along with resolution and aspect checks.
It says "looks compliant". It does not say "accepted", because no tool can — the issuing authority decides. Any product that tells you otherwise is selling you a feeling.
Step 4 — Get under the file-size limit
Portals frequently cap the upload, often somewhere between 20 KB and 250 KB. Two ways this goes wrong:
- You export at maximum quality and the file is 400 KB, so the portal refuses it.
- You compress until it fits and the photo looks like it was faxed.
The export bar shows the real encoded size as you move the quality slider — not an estimate, the actual bytes. Open Size target to enter the portal's minimum and maximum, and the readout turns green when you are inside it.
If you would rather not nudge a slider at all, a paid plan can search for a qualifying quality automatically. The readout itself, and the manual slider, are free — seeing the number is not the part worth charging for.
There is more on this in how to resize a photo to 20 KB for an exam form, which goes into what actually degrades when you compress a face.
Step 5 — Download, and check the DPI
Click Download. You get a JPEG at exactly the pixel size the document requires.
One detail that separates a file that prints correctly from one that does not: the resolution written inside it. A JPEG saved by a typical web tool declares no print resolution, so Windows and most print dialogs fall back to assuming 96 DPI. Your 413 × 531 pixel photo is then treated as roughly 109 × 140 mm — three times too large — and prints accordingly.
JSK Photo Studio writes the real resolution into the file, so 413 × 531 pixels is understood as 35 × 45 mm and "print at actual size" means what it says. If you intend to print, use JPEG or PNG; WEBP cannot carry a resolution that print tools honour, and the format picker tells you so before you download rather than after you measure.
The two mistakes that cause most rejections
Printing at "Fit to page". This rescales everything to the paper and quietly destroys the physical size you just got right. Print at 100% or "Actual size", every time.
Assuming pixels are enough. A specification in millimetres is a physical requirement. Pixels only become physical when a resolution is attached. This is the single most common reason a photo that "looked right on screen" comes out of a printer at the wrong size.
If you need several copies — and you usually do — you can tile one photo across a full sheet with cut guides and export a PDF whose page box is set in true millimetres. How many passport photos fit on an A4 sheet covers that, including why the answer changes with your margin.
What this costs
Nothing, for the path described above. Choosing a document size, cropping, the compliance card, the size readout, sheets and PDF export all work with no account and no payment. There is no watermark and no export limit.
A free JSKAPPS account adds saved projects and custom sizes. A paid plan adds a full photo editor, HEIC support for iPhone photos, and the automated size search. Those are conveniences on top of a job that already completes for free.
Why "on your device" is checkable here
Plenty of tools claim privacy. What is different about an extension is that the claim is inspectable:
- It declares no host permissions, so it cannot reach a website even if its code tried to.
- The only network destination it can contact is the JSKAPPS licensing API, and only if you have deliberately connected an account.
- Exports are re-encoded from raw pixels, so EXIF and GPS data never reach the file you save — worth knowing, because phone photos routinely carry the coordinates of where they were taken.
- The workspace shows a live network counter. You can also open your browser's DevTools Network tab and watch it stay empty.
You do not have to trust the sentence. You can check it.
Next steps: Install JSK Photo Studio · Read the documentation
About this tool
JSK Photo Studio