 JSKAPPS
How many passport photos fit on an A4 sheet? (And why yours print the wrong size)
Somnath Roy · August 20, 2026
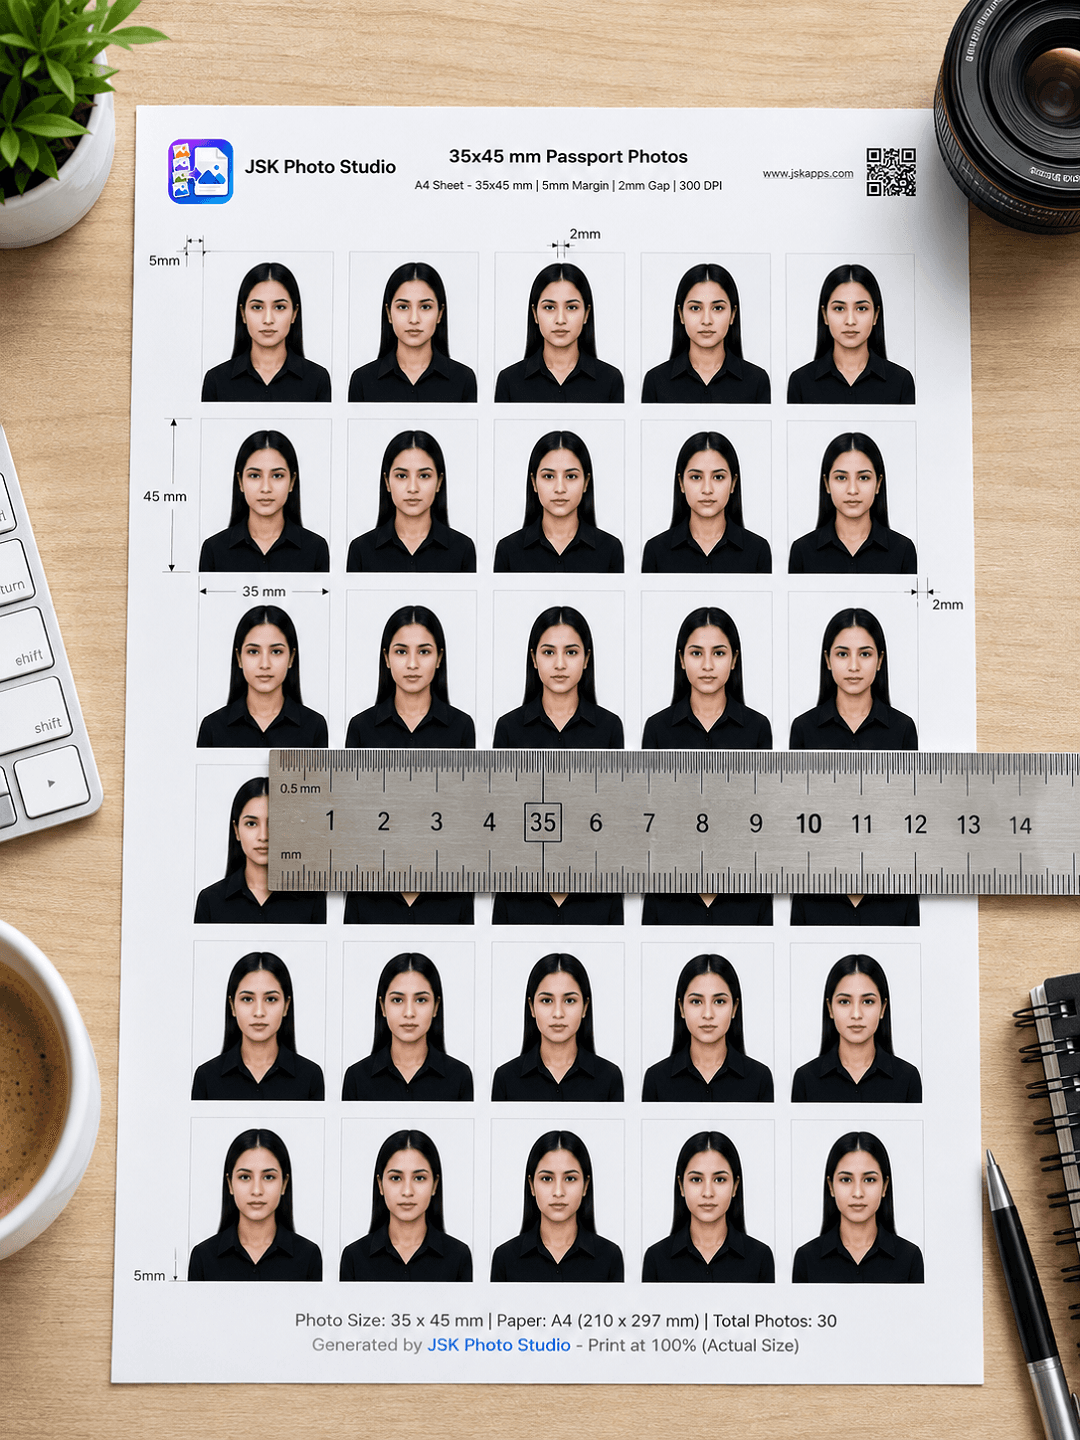
You need eight passport photos. The print shop wants a small fortune and closes at six. You have a printer and a packet of photo paper, so this should be a solved problem.
It usually is not. Either you fit four photos on a sheet and waste most of the paper, or you print a full sheet and discover — with a ruler — that every photo is about 40 mm wide instead of 35 mm, which makes the whole sheet useless.
Both problems have precise causes, and both are fixable.
The short answer
At a 35 × 45 mm photo size on A4, with a 5 mm minimum margin and a 2 mm gap between photos:
30 photos — five across, six down.
Increase the margin to 10 mm and the gap to 5 mm and you get 20 — four across, five down. That is a large difference for two settings most people never touch, so it is worth understanding where it comes from.
The arithmetic
A4 is 210 × 297 mm. Subtract the margin from both sides:
- Usable width: 210 − (2 × 5) = 200 mm
- Usable height: 297 − (2 × 5) = 287 mm
Now fit 35 mm columns with a 2 mm gap between them. Five columns need 5 × 35 + 4 × 2 = 183 mm — fits inside 200. Six would need 6 × 35 + 5 × 2 = 220 mm — too wide. So five columns.
Rows of 45 mm with a 2 mm gap: six rows need 6 × 45 + 5 × 2 = 280 mm — fits inside 287. Seven would need 327 mm. So six rows.
5 × 6 = 30 photos.
Push the margin to 10 mm and the gap to 5 mm and the usable area drops to 190 × 277 mm. Now 5 × 35 + 4 × 5 = 195 mm no longer fits, so you lose a whole column and drop to four. That single column costs you six photos.
All six paper sizes compared
Same 35 × 45 mm photo, at both settings:
| Paper | Size (mm) | At 5 mm margin / 2 mm gap | At 10 mm margin / 5 mm gap |
|---|---|---|---|
| A4 | 210 × 297 | 30 | 20 |
| US Letter | 215.9 × 279.4 | 25 | 25 |
| A5 | 148 × 210 | 12 | 9 |
| 5R | 127 × 178 | 9 | 6 |
| 4R | 102 × 152 | 6 | 4 |
| A6 | 105 × 148 | 4 | 4 |
One row of that table looks wrong at first glance, and it is worth explaining because it catches people out.
US Letter is shorter than A4 but holds more photos at the tighter margin. Letter is 215.9 mm wide against A4's 210 — and that extra 5.9 mm is exactly enough to fit a fifth 35 mm column where A4 only fits four. Letter loses on height and wins on width, and at a 10 mm margin the width wins.
This is the sort of thing that makes "how many fit?" a genuinely computed question rather than a number to memorise.
The bigger problem: the file that prints too big
Fitting them is arithmetic. Getting them to measure correctly is a different failure, and it is much more common.
Here is the mechanism. A digital image is just pixels — a 35 × 45 mm photo at 300 DPI is 413 × 531 pixels. Pixels have no physical size on their own. To print at a known size, the file must declare its resolution, and JPEG and PNG both have a field for exactly that.
Most web tools never write it. When the field is missing, Windows, macOS Preview and most print dialogues fall back to assuming 96 DPI. Your 413 × 531 pixel photo is then interpreted as:
- 413 ÷ 96 × 25.4 = 109 mm wide
- 531 ÷ 96 × 25.4 = 140 mm tall
That is three times too large. The same arithmetic on an ID card is worse: a CR80 card is 85.6 × 53.98 mm, which is 1011 × 638 pixels at 300 DPI — and at an assumed 96 DPI it prints 267 mm wide, wider than the paper.
So the photo was correct, the printer was correct, and the file in between lost the one number that made it physical.
Two fixes, in order
1. Print from a PDF, not an image. A PDF has a page box measured in real units. If the page box says 210 × 297 mm and a photo is placed at 35 × 45 mm within it, there is nothing left to interpret. This is why JSK Photo Studio exports sheets as PDF with the page box set in true millimetres rather than handing you a large JPEG and hoping.
2. If you must print an image, make sure it carries its DPI. JSK Photo Studio writes the real resolution into every JPEG and PNG it exports, so a single photo prints at the right size too. WEBP is the exception — the container cannot carry a resolution that print tools honour — and the format picker says so before you download rather than after you measure.
Then, when printing: choose "Actual size" or 100%, never "Fit to page". Fit to page rescales everything to the paper and undoes all of the above. This is the single most common reason a correctly built sheet still comes out wrong.
The last half-millimetre
Even with all of that right, printers are not perfectly calibrated. A 2% scaling error is invisible on a document and fatal on a 35 mm photo — it is 0.7 mm, which is enough to fail a strict counter check.
The Sheet tab includes a calibration sheet: it prints a 100 mm ruler, you measure it with a real ruler, and you type in what you actually measured. Every sheet after that is corrected by the difference. Print it once, and stop guessing.
Margins are a minimum, not a promise
One detail worth knowing, because it surprises people who measure the result.
The margin control sets a minimum. The block of photos is then centred in whatever printable area remains, so the margin you actually measure is usually larger. On A4 at a 10 mm minimum margin with 4 × 5 photos, the block is 155 mm wide inside a 190 mm printable width — so the real left and right margins are 27.5 mm, not 10.
That is correct behaviour, because centring keeps the cutting borders even. What matters is that the badge under the sheet reports the margin you will actually measure, rather than repeating the setting back at you. If a tool tells you "10 mm margin" and your ruler says 27.5, the tool is not lying about the layout — it is quoting the wrong number.
Cutting them out
- Corner marks rather than full lines are usually better: they mark the cut without leaving visible ink along the edge of the photo if your cut drifts slightly.
- Use a guillotine or a steel rule and a craft knife, not scissors, for anything a counter will inspect.
- Cut inside the guide, not on it, if the guide line is visible on the print.
- Photo paper cuts more cleanly than plain paper and does not fray at the corners.
Putting it together
- Choose the document size — 35 × 45 mm for an Indian passport, 2 × 2 inches for a US one, and so on. Each built-in size links to the issuing authority's own specification.
- Choose the paper you actually have.
- Leave the margin at 5 mm unless your printer has a wider unprintable border, in which case raise it — and accept the cost in photos per sheet.
- Read the badge to confirm the arrangement and the real margins.
- Export the PDF, print at 100%, and measure one photo before you cut all thirty.
That last step takes ten seconds and has saved more sheets of photo paper than any other habit.
If you have not made the photo yet, how to make a passport-size photo without uploading it anywhere covers the whole sequence. And if the form also caps the file size, how to resize a photo to 20 KB for an exam form covers that separately — printing and uploading pull in opposite directions, and it helps to know which one you are solving.
Building sheets, the calibration sheet and PDF export are all free, with no account required.
Next steps: Install JSK Photo Studio · Read the documentation
About this tool
JSK Photo Studio